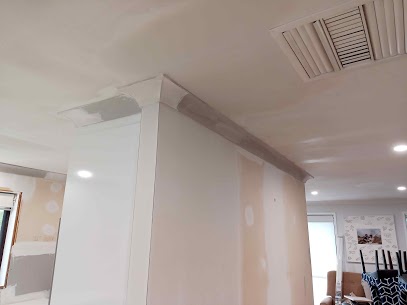
How is plaster used for Ceiling Repairs?
Ceiling plaster deteriorates in two ways, one by showing cracks all over the surface and the other by sagging. These faults are the outcome of an uneven settlement of the foundation, leakage of any utility, and structural movements. Therefore, ceiling repair is necessary to increase the life of your house. Here you will find the ways to use plaster for ceiling repairs:
“The final stage of ceiling repairs involves primer and paint to your repaired portion.”
Identify repair spots
Your repaired area is easy to find. You need to identify the cracks and sags on your ceiling. Cracks are visible in the structure, while sags can be spotted by viewing the plaster bulge.
Cover your area with drop cloths for plaster ceiling repairs
You don’t want your walls and floor to get dusty. To protect your area from scrapped material, use drop cloths to cover the walls and floor of your house. Affix drop cloths by tap all over the required areas.
Scrap loose area to use plaster for ceiling repairs
Get rid of all the bulged plaster from the laths by using a putty knife or any other tool. Make sure that you have cleared all loose areas. Don’t over scrap the well-bonded old plaster.
Clean the surface
Remove all dust, debris, smoke, and grease from the opened patch. It is essential for the proper bonding of new plaster with the laths. You can use sandpaper or a wire brush for this purpose. Make sure you don’t leave any dust or unwanted materials because it may weaken the bond of plaster to the laths.
Moist your treated portion to use plaster for ceiling repairs
Wet the surface to increase the bondage property of plaster with the laths. You can opt for water or Big Wally’s conditioner to moist your repaired portion of the ceiling and let it dry for approximately 10 minutes. It is important to wet all edges and corners to get this done effectively.
Plastering ceiling with joint compound
Use Big Wally’s plaster magic to patch the ceiling repairs. You can find plaster magic easily in the market. Take the bucket of Big Wally’s patching plaster and add the water to get the required butter-like consistency. Take a few quantities of joint compound on the plasterer trowel and apply the first coat of plaster with a putty knife (3″ to 6″).
Sponge the surface to get a smooth texture
After applying the first coat of plaster, your surface requires a smooth and homogeneity with old plaster. Pick a sponge and apply it over fresh plaster gently. Avoid over scraping the surface with a sponge to prevent it from tearing your treated spot. Repeat this process after every new layer of plaster. Remember to use 3-coats of plaster.
Use primer and paint
The final stage of ceiling repairs involves primer and paint to your repaired portion. It is a vital step as it’ll give your ceiling a nice appearance and hide all the signs of treated surfaces. Use a primer before applying paint to the surface. The primer works as a binding agent between paint and plaster. Finally, use paint of the same colour as the old ceiling to hide plaster repair work.

Top 21 Tips Before You Hire A Plasterer
Top 21 Tips Before Hiring A Plasterer Before hiring a plasterer to install plasterboard or repair damaged plaster, there are important things to consider, here

How much does plastering cost? | 2021 Australian price guide
How much does plastering cost? | 2021 Australian price guide Summary: Plastering typically costs around $25-$50 per square metre (depending on size), so if you’re

Is It Ok To Plaster Over Wallpaper
Is It OK To Plaster Over Wallpaper? You could be thinking you’re saving time and money by plastering over your wallpaper, but the truth is

How to repair old plaster
How to repair old plaster? It is tempting to replace the plaster with drywall when renovating an old home. However, it can be the silliest

How much does it cost to repair plaster walls
How much should it cost to repair plaster walls? Cracks on the plaster walls, drywalls, and hollow doors are some of the most common repairs

What is the best way to Repair your Plaster Walls
What is the best way to Repair your Plaster Walls? Repairing plaster walls is not a difficult task. You need to know the exact method


