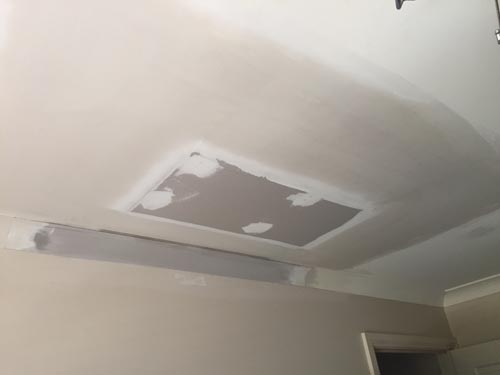
Quick Plaster Repairs to Walls
Plaster repairs to walls is an easy task. It requires some tools and materials to make the appearance of your house better. You can renovate your walls within no time if you know the proper techniques. Here is a quick way to repair cracks and holes in your walls.
“The final step is to give your treated surface the same look as your old wall. You do not want others to notice that you just repaired your walls.“
Tools and Materials Required for Plaster Repairs to Walls
● Putty Knife or Trowel
● Mixing tray
● Sandpaper or sponge
● Joint compound or pre-mixed plaster
● Primer and Paint
● Drier
7 Steps for Quick Plaster Repairs to Walls

Step 1: Clean your cracks and holes
Clean your repaired surface first. It looks like an unnecessary task in plaster repairs, but it is a much-needed step. If cracks and holes aren’t clean, it will not allow the joining compound to make a good bonding with old plaster.
If you have a vacuum at your place, use it to clear all dust and debris in cracks and holes. Make sure you have cleaned it thoroughly so that no dust particles are left behind.
Step 2: Wet Your Treated Surface
Start by moistening your cracks and holes in the wall to increase the adhesiveness in the old plaster. You can use water for this or any other available adhesive at your home. There are special adhesives available in the market for this purpose.
Step 3: Preparing joint compound
The required materials you’ll need for this task vary according to their quick-setting time property. It can range from 20, 45, and 90 minutes joint compounds are available in the market. You should pick at least 45 minutes because it will provide enough time to complete your filling work.
Take material in the tray – a rectangular is preferable – mix it with the right proportion of water. Keep adding water and joining the compound until you get a peanut butter-like consistency.
Step 4: Fill the Cracks and Holes
After mixing water into the jointing compound, your race with the time starts. You have to fill all your fault surfaces within the mentioned time of your joint compound.
Pick a putty knife or trowel – whichever you feel better to handle – and take a small amount of putty – you just prepared – to fill the cracks and holes. Make sure you fill your faulty surfaces and smoothening them with the knife.

Step 5: Let it dry
Use a plaster dryer to speed up your plaster repairs to the walls. It will dry your fresh filling in no time. But do not over-dry your putty because it can burn it and make your task difficult. If you do not have a plaster dryer, you can leave your surface to nature to dry itself. But you have to possess little patience for it.
Step 6: Rub your filled surfaces with sandpaper or sponge
You can use either 120-grit sandpaper or a sponge to make your surface even with the old plaster. Do not use sandpaper or sponge more than required because it may tear your fill. Better to go for sandpaper since it will make your task easier and time-saving.
Step 7: Paint your walls well and cover up your plaster repairs to the walls
The final step is to give your treated surface the same look like your old wall. You do not want others to notice that you just repaired your walls. Use the same pigment or colour to give your walls the exact appearance.

If You’re Plastering Large Holes Here is what you need to know
If You’re Plastering Large Holes Here is what you need to know Are large plaster holes ruining the appearance of your house’s Walls? Are you

How is plaster used for Ceiling Repairs
How is plaster used for Ceiling Repairs? Ceiling plaster deteriorates in two ways, one by showing cracks all over the surface and the other by

Plaster Repairs for ceilings and avoiding these mistakes
Plaster repairs for ceilings: Avoiding these mistakes Plaster damages on the ceiling can get worse pretty fast if not repaired timely and fitly. Plaster on

Repairing the holes in Plasterboard walls and hollow doors
Plasterboard Repairs: Repairing the holes in Plasterboard walls and hollow doors Repairing holes in plasterboard and hollow doors requires precession and proper tools. For plasterboard

Quick Plaster Repairs to Walls
Quick Plaster Repairs to Walls Plaster repairs to walls is an easy task. It requires some tools and materials to make the appearance of your

Plaster Repairs And Common Mistakes
Plaster Repairs: Definition, DIY ideas, and Common mistakes Plaster repairs are essential for your home and office to keep it in good condition. It increases
